Hello readers, today we are going to make a step by step guide on “How to Take a Screenshot on Windows 8”. In this guide, you will get the easiest and working way only to do this. Taking a screenshot on Windows PC or laptop is not hard work. You only have to follow some steps. Let’s read those steps in the paragraphs below.
Easy way to Take a Screenshot on Windows 8/10

You may need screenshots at any time. So, you should know how to take a screenshot on your device. By the way, it does not matter, you are using your PC / Laptop for personal use or business use. Screenshots are also known as screen grabs and these are pictures of your display screen. There are different ways available to take a screenshot on Windows 8 PC. Read them below.
1. Use the Keyboard Shortcut Buttons
- PrtScn (Print Screen) or CTRL+PrtScn
This is the first method for you to take a screenshot in Windows PC or laptop and it is also a very well known method. You can use this method in all versions of Windows. You only have to press the “PrtScn (Print Screen)” key or “CTRL+PrtScn” keys together.

After this, Windows will create a screenshot of the current entire display screen and save it to the clipboard. In the next step, you have to open any image editing software just like paint and then paste the picture from the clipboard, You only have to press and hold down the “CTRL+V” keys together to paste the image which is on Clipboard. After doing this, you can save it as a JPEG or PNG file and use it anywhere.

2.Another Keyboard Shortcut to Take a Screenshot
- Windows + PrtScn
When you want to take a screenshot of the entire screen and save it in your hard drive as a file without using any other software or tool, then you have to press the “Windows + PrtScn” keyboard buttons together.
Check Also:How To Take a Screenshot on HP Laptop
After clicking those buttons together, Windows will automatically store the screenshot in the Picture Library and in the screenshots folder. You will see that the name of the stored file is “Screenshot(number).png“, where the number shows how many screenshots have been taken yet on that device.
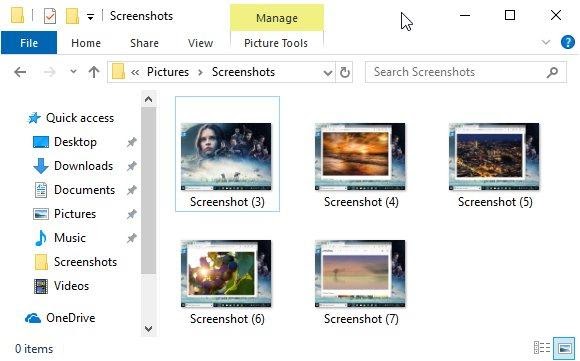
If you are using Windows 10 PC or laptop then you can find those screenshots if you use the Photos app, by going to “Folders -> Pictures -> Screenshots“. This method will not only save the file, but it will also copy the screenshot to the clipboard.
3.Another Keyboard Shortcut to Take a Screenshot
- Alt + PrtScn
This is another keyboard shortcut available to take a screenshot in Windows 8 computers or laptops. You have to open the window which you want to capture and then press the “Alt + PrtScn” buttons together on your keyboard. The taken screenshot will be saved in the clipboard. Now, you can open Paint or any other image editing software where you can paste the image. After this, you can edit it and save it to your hard drive of your Windows PC or laptop.
4.The Snipping Tool Application
One of the best and easy to use tools for taking screenshots of your computer screen. This tool works on every version of windows and it is already installed in all Windows. And the Snipping tool is specially made for taking screenshots. Using this tool, you can create many types of screenshots like Windows, whole, or custom areas of your screen.
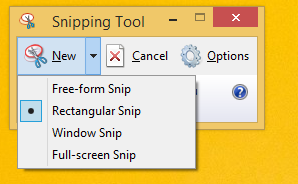
Just click on the option in which shape you want to capture the screenshot and then move your cursor on your screen. After this, click on the save button to save. Now enter the file name and select the location. That’s it. You have taken a screenshot on Windows 8.
Note: You can use the hidden secret hotkey of this tool. Many snipping tool users don’t know about this. When you start this Snipping tool then this tool allows you to take a screenshot with the Ctrl+Print Screen hotkey! Using this hotkey, you can capture even the menus. Just open the application and press these buttons and then the snipping tool will capture anything including the opened menu items!
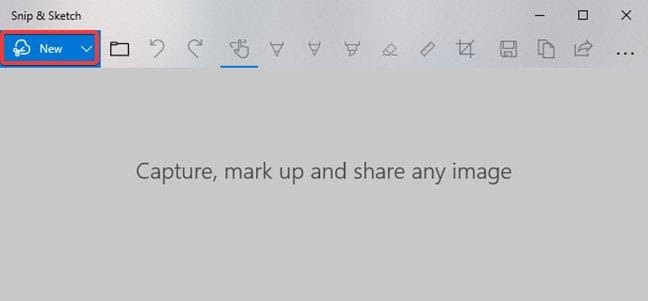
5.Use the Snip & Sketch app (Windows 10)
In the update of October 2018, Windows 10 came with a new app that is targeted to replace the snipping tool. Nowadays, these two apps are available together in Windows 10. This Snip & Sketch adds new features. As you can see this app name suggests that they focus on sketching or modifying the screenshots after you take them. This new app has more than one method to take screenshots on PC or laptops.
Final Words: If you read this article carefully then I am sure, now you know How to Take a Screenshot on Windows 8 in just a few steps. We mentioned many methods for this thing. You can try any one and it will take a screenshot on your Windows 8 PC also. Share this article with your friends, family members or anyone who wants to know about this. Thanks for reading this article till the end.